Home Services About Testimonials Before & After Blog Contact Insurance Claims
(951) 268-3006 Insurance Claim

What the photos show

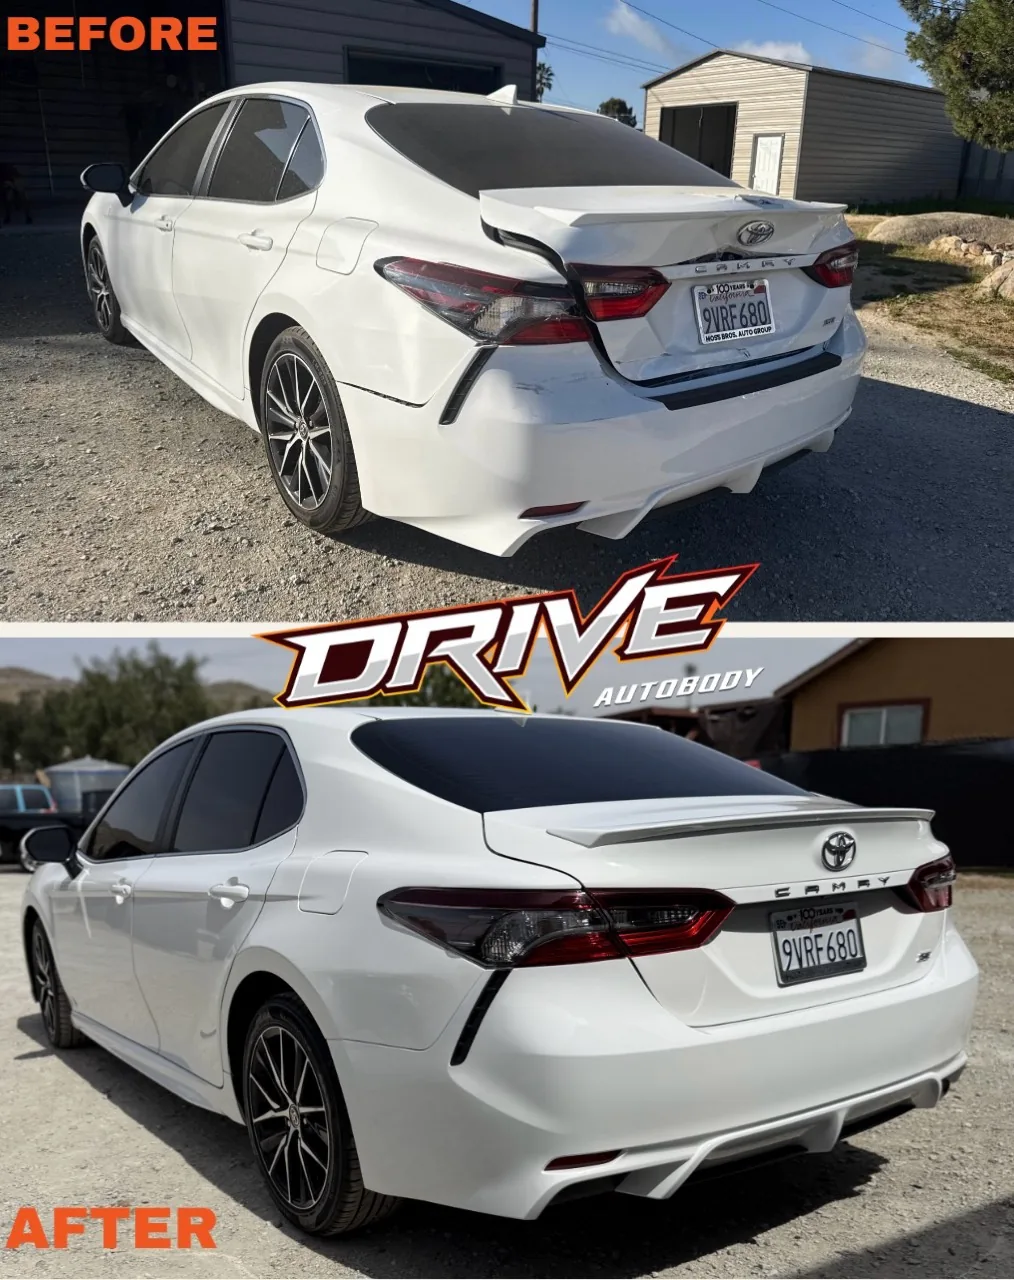
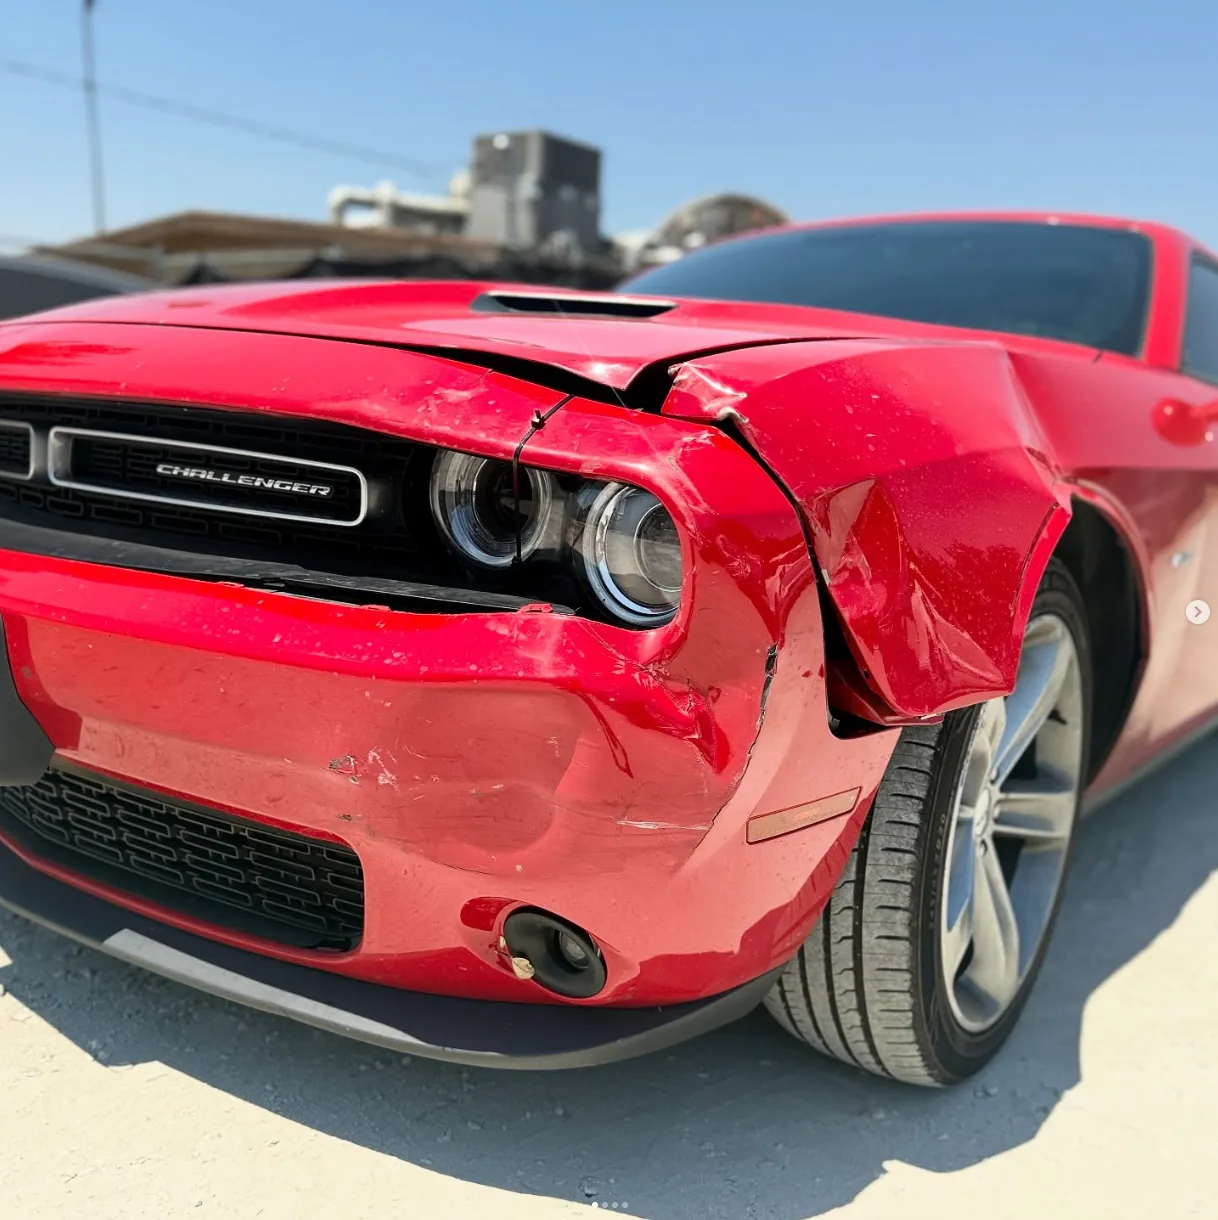
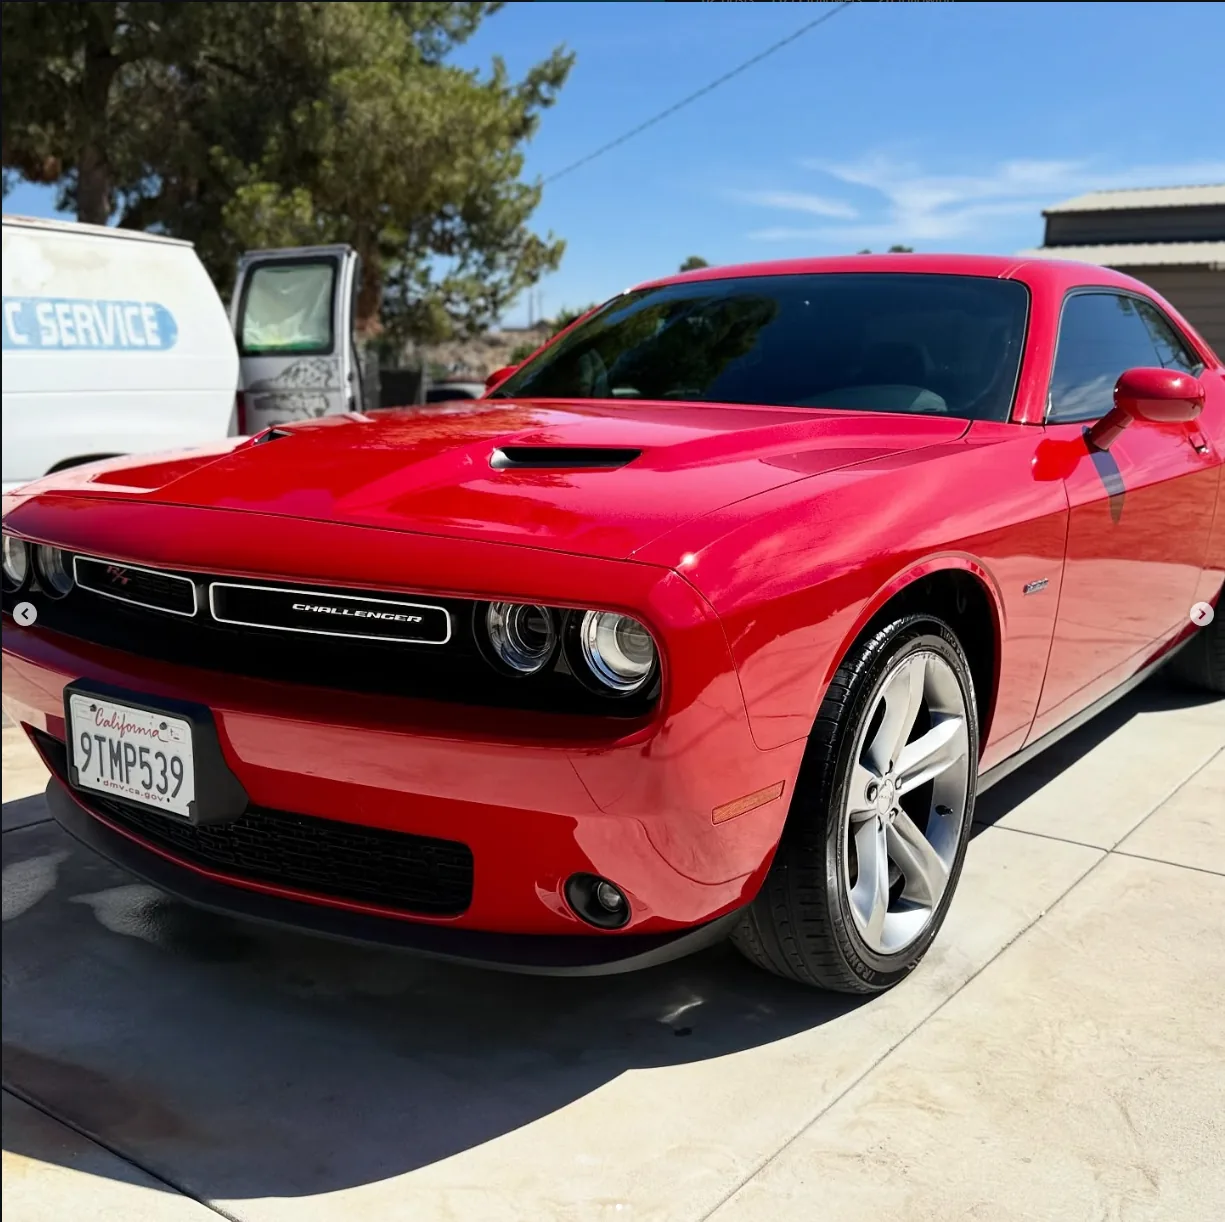
A glossy finish matters, but collision repair is also about restoring visible body lines, panel fit, and the damaged areas identified in the approved repair plan. Each vehicle below arrived with a different problem: front-corner impact, side-panel damage, a crushed bedside, or rear collision damage.

The descriptions stick to what the photos support. Parts, procedures, hidden damage, calibrations, and insurance coverage are determined vehicle by vehicle after inspection and authorization. For a closer look at how that works, see our collision repair, paint and refinishing, and insurance repair pages.
Completed work

Five more repair stories

Every estimate starts with the vehicle in front of us. These examples show capability, not a promise that two repairs will require the same work or timeline.

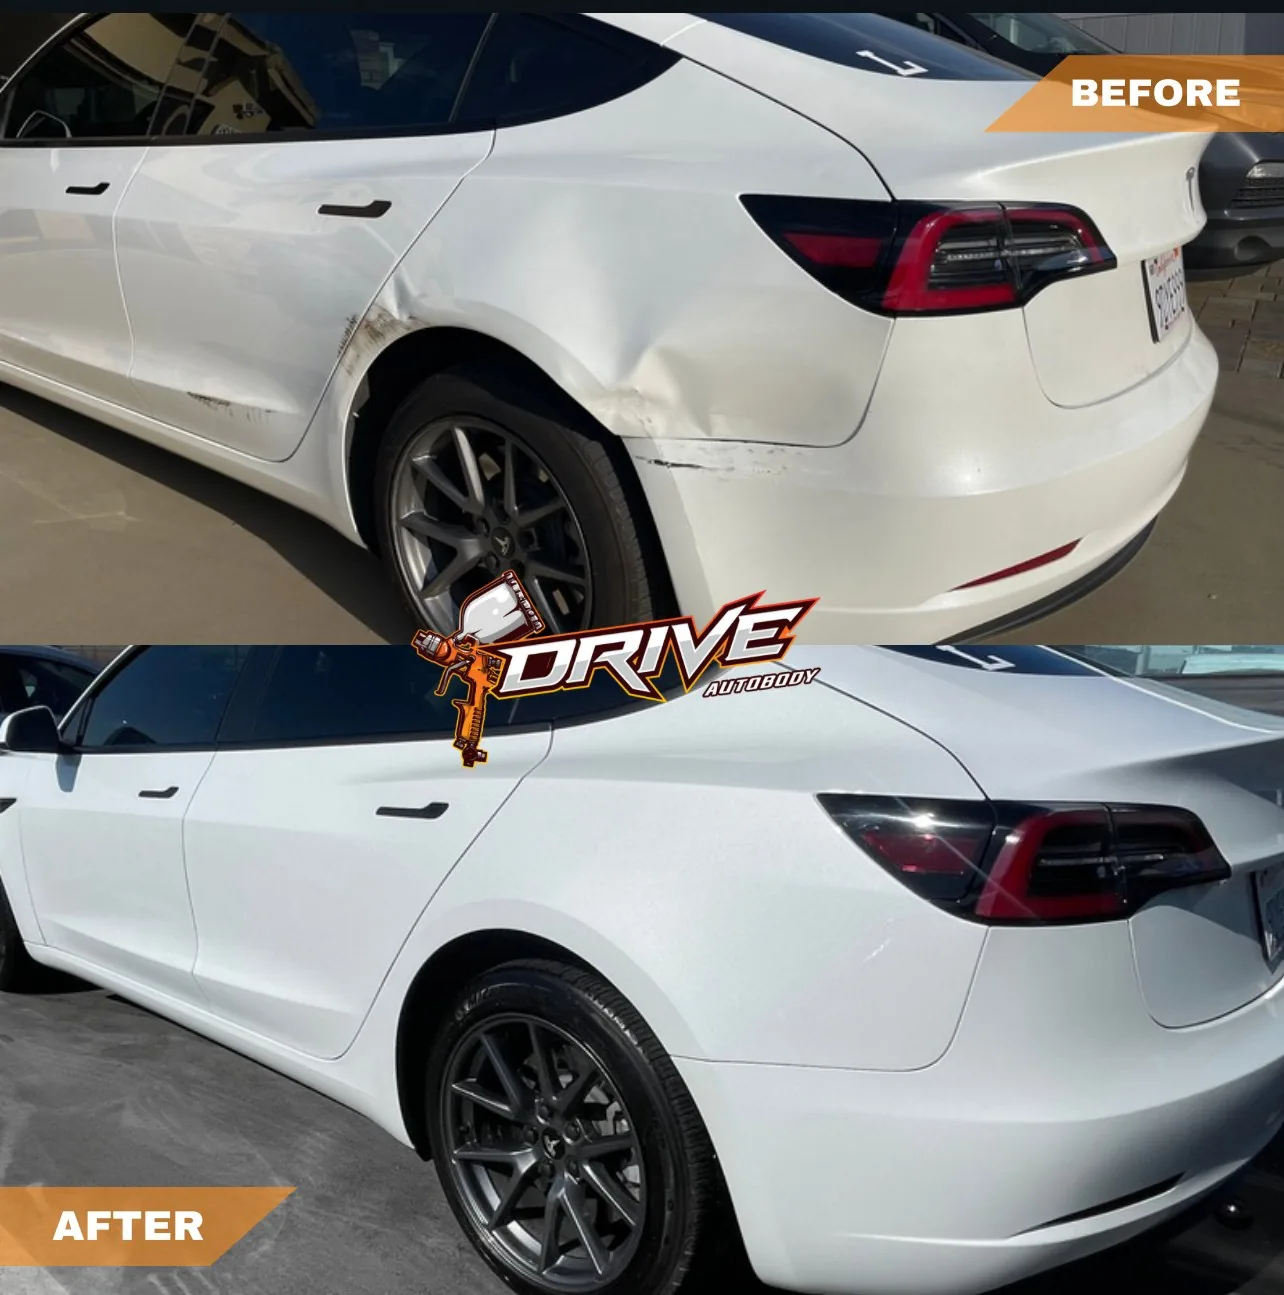
Tesla Model 3 before and after rear-door and quarter-panel collision repair
CASE 02Side impact

Tesla Model 3

The arrival photo shows scraping and deformation around the rear door, wheel opening, and quarter-panel area. The completed photo shows the affected contours and finish restored so the side profile reads cleanly again.

Panel repairRefinishingFit and finish
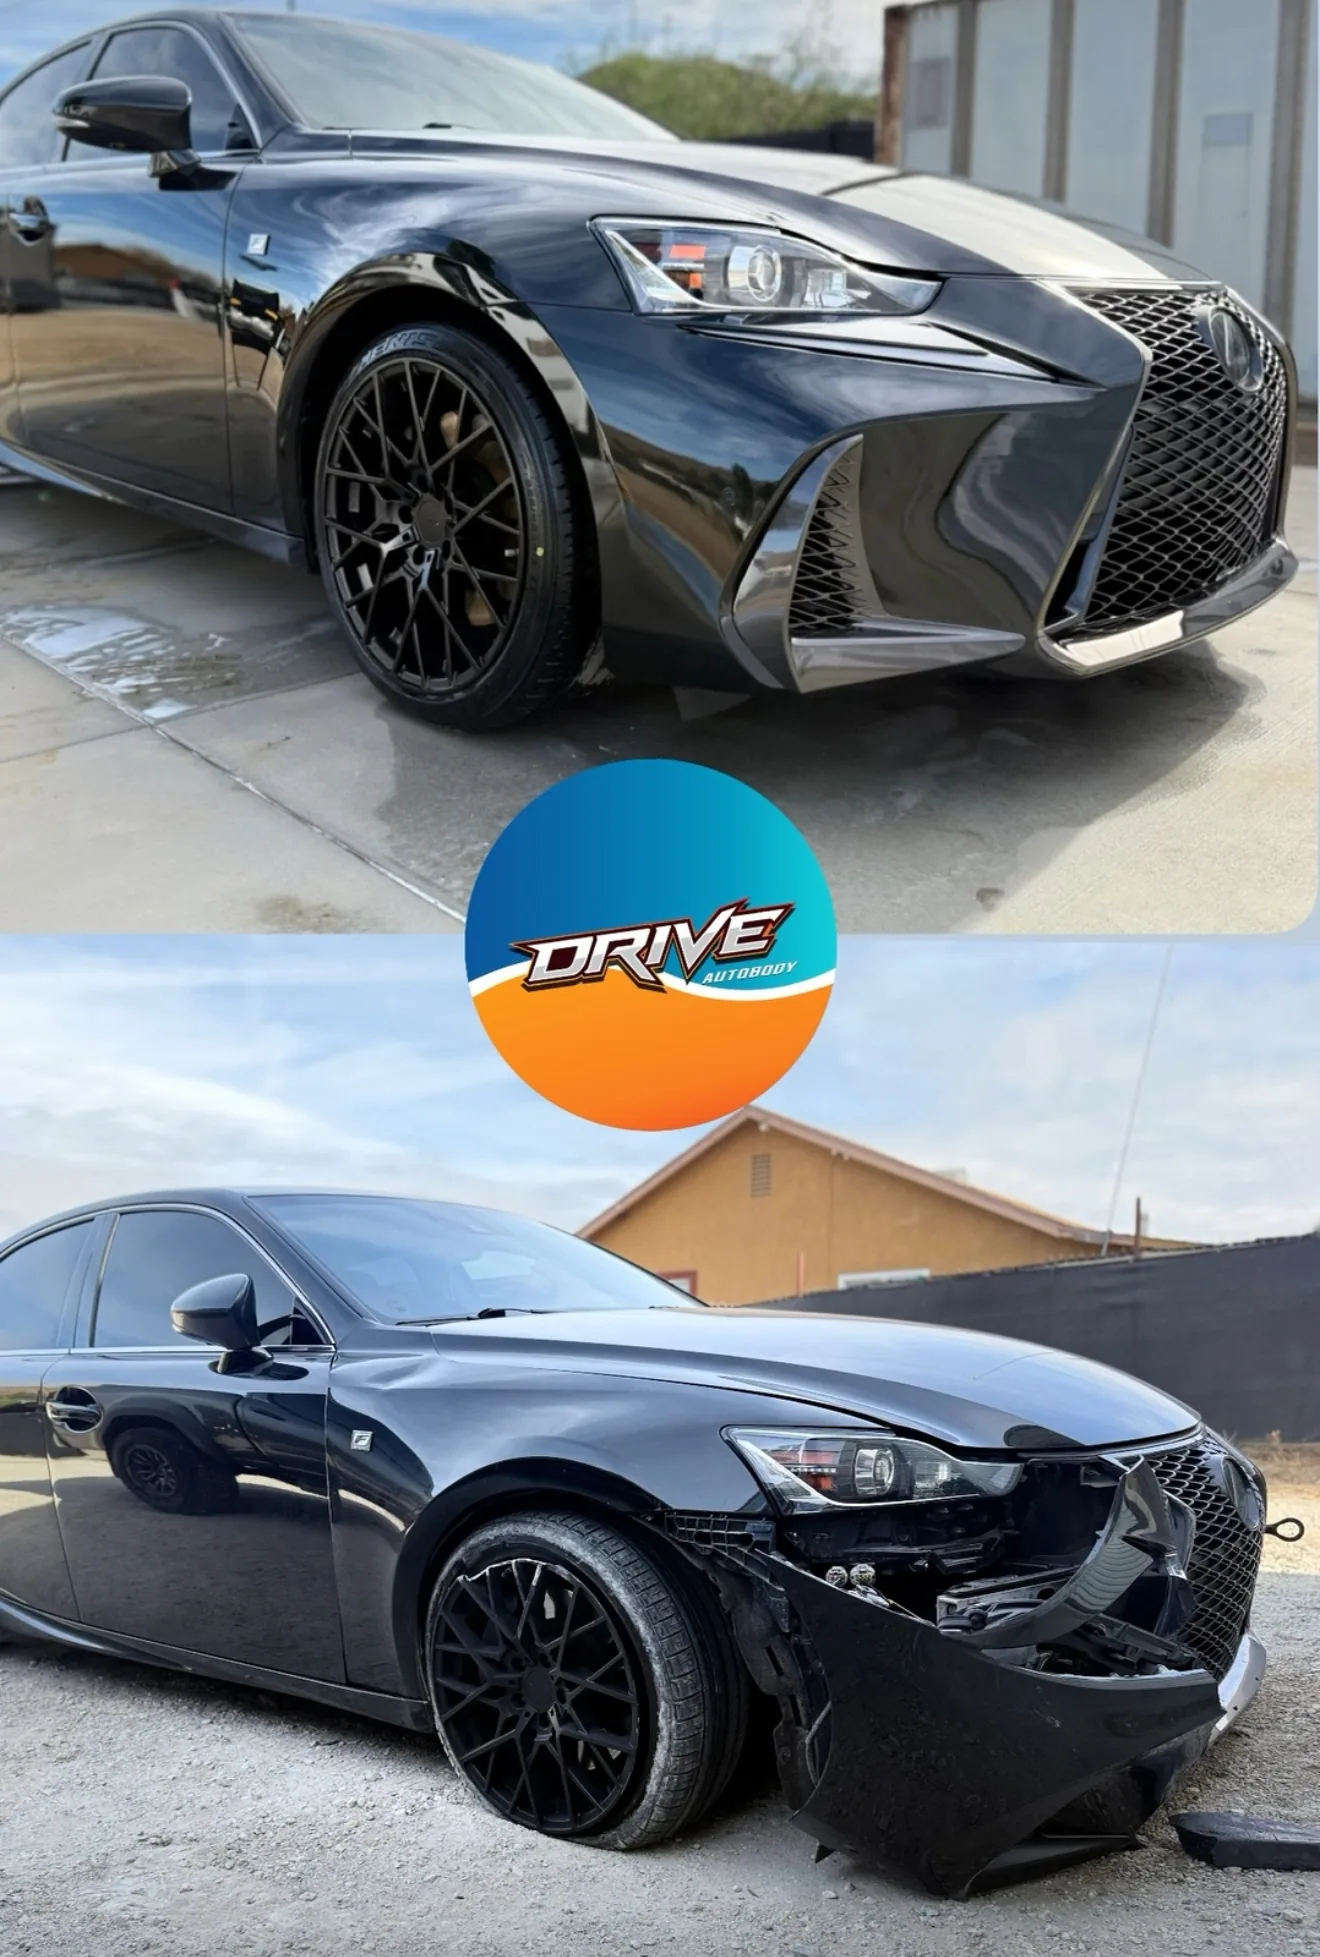
Lexus before and after front bumper and adjacent front-end collision repair
CASE 03Front end

Lexus IS

The before view shows visible front-bumper and adjacent fitment damage. The finished view highlights restored alignment and a consistent black finish across the repaired front end.

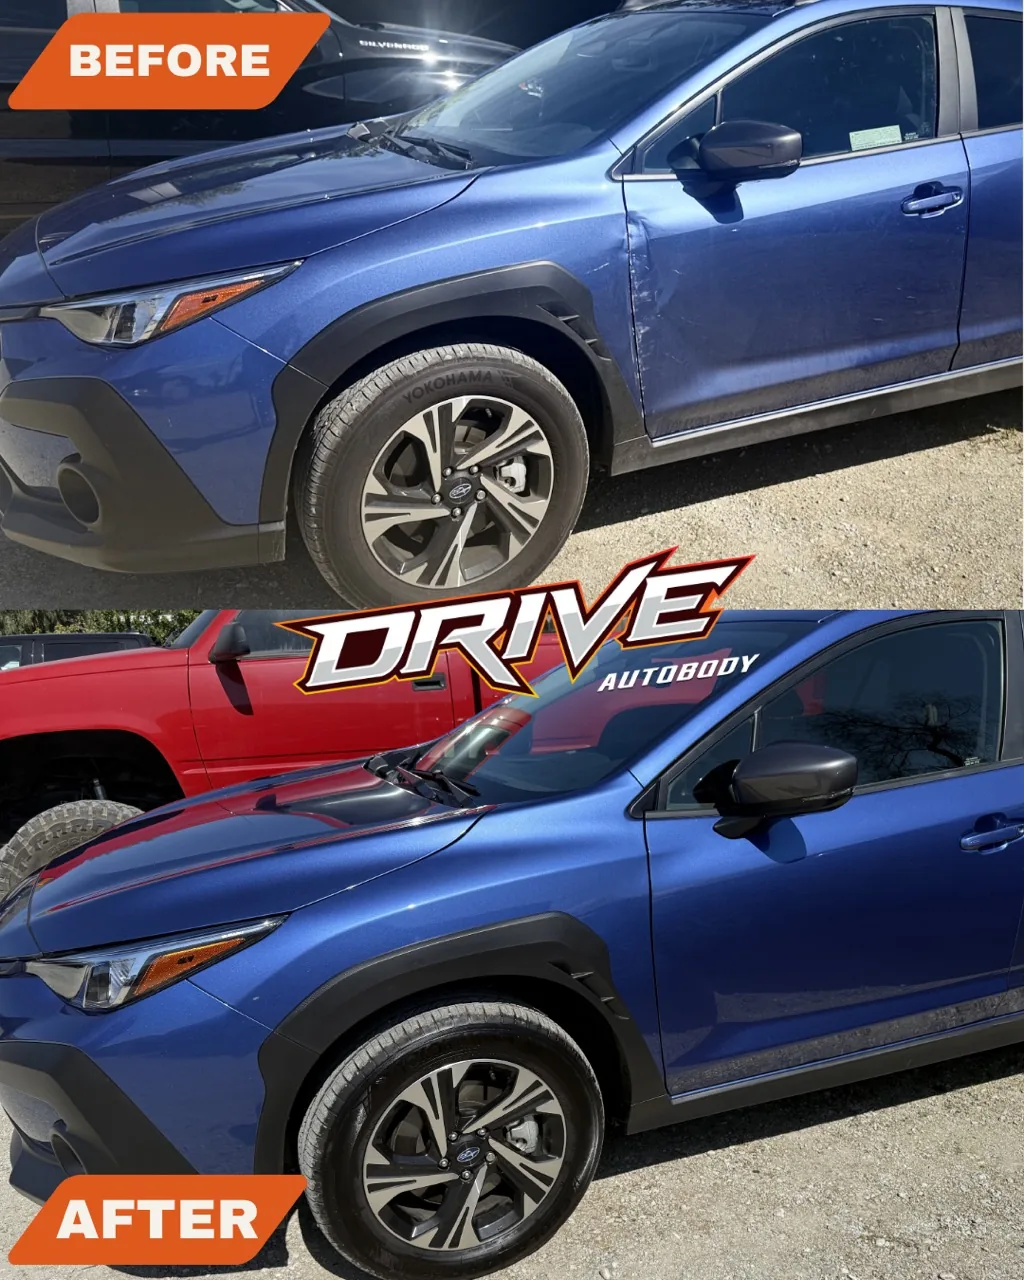
Subaru Crosstrek before and after front-side panel and door-area collision repair
CASE 04Front side

Subaru Crosstrek

Visible damage ran through the front-side panel and door-edge area. The completed view shows restored body lines and a matched blue finish across the affected section.

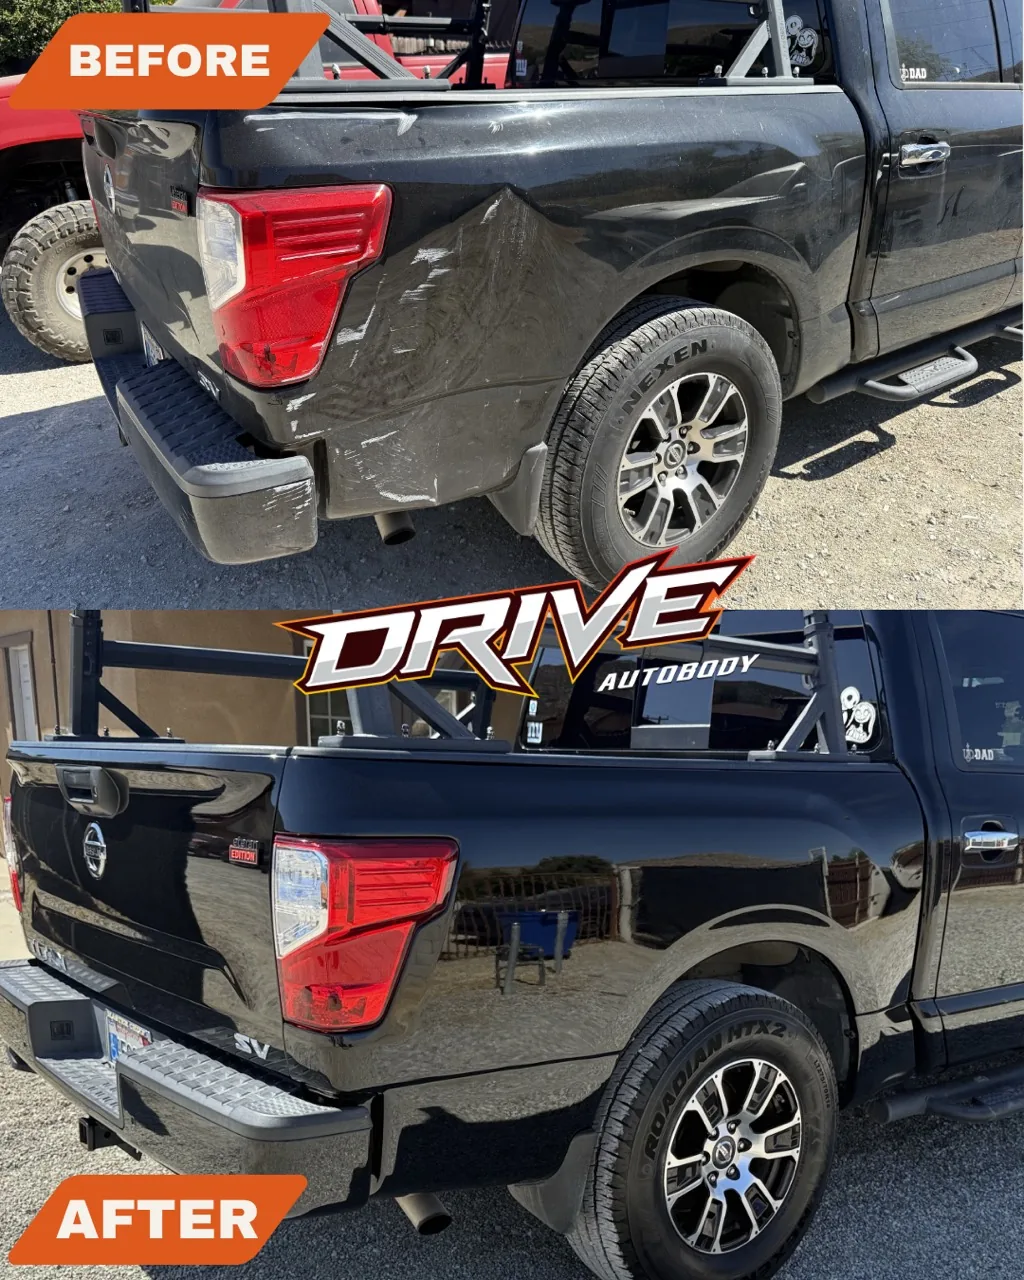
Nissan pickup before and after rear bedside dent and scrape repair
CASE 05Bedside impact

Nissan Pickup

A deep dent and scrape distorted the rear bedside around the wheel opening and taillight. The after view shows the bedside contour and dark finish restored.

Toyota Camry before and after rear collision repair involving the decklid and bumper area
CASE 06Rear collision

Toyota Camry

The arrival view shows substantial visible damage around the decklid, bumper, lamps, and adjacent rear body area. The completed view shows restored rear fit, shape, and finish.

From damage to delivery

What happens between the two photos?

The exact procedures depend on the damage and approved repair plan. A typical collision job moves through these four checkpoints.

  1. 01 / DOCUMENT

    Inspect the visible damage

    We photograph the vehicle, identify affected areas, and explain when teardown or measurements may be needed for a detailed plan.

  2. 02 / PLAN

    Build and authorize the repair

    Parts, procedures, insurer approvals, supplements, and customer-responsible charges are clarified before additional authorized work proceeds.

  3. 03 / REPAIR

    Restore body and finish

    The team completes the approved body, structural, and refinishing operations that apply to that vehicle and damage.

  4. 04 / VERIFY

    Check fit, finish, and delivery

    Final checks focus on the repaired areas, visible alignment, finish quality, and the completion requirements in the repair plan.

Your vehicle is the next case, not a template

Show us the damage.

Bring the vehicle by during business hours or send photos for a preliminary look. A visual estimate is free; if detailed planning requires teardown, diagnostics, or measurements, Drive explains any related charge before authorization.

call Call Now